SGN Documentation
3.3 Managing Accessions
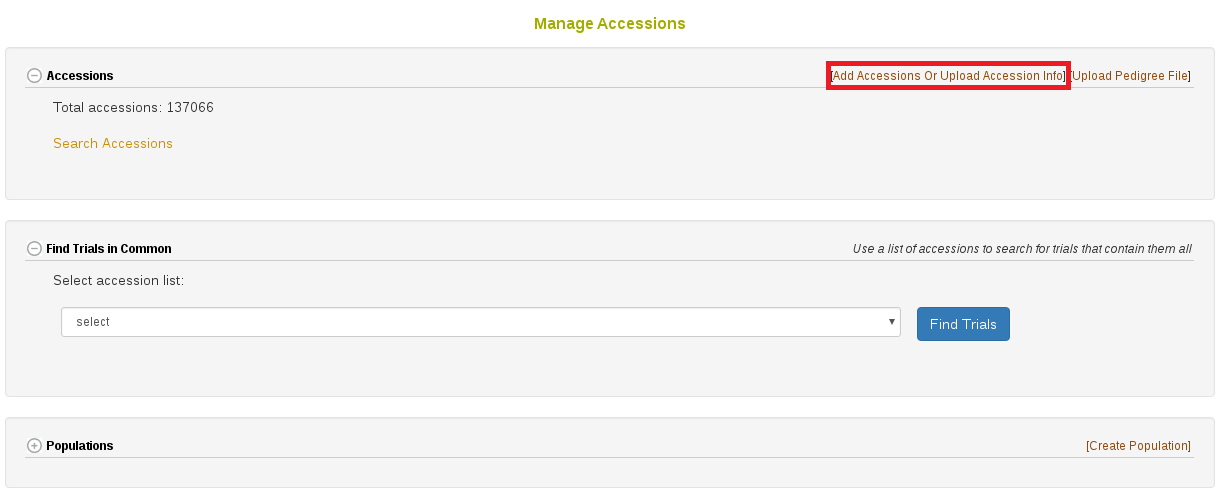
The “Manage Accession” page provides links for adding new accessions. You can choose to add accessions into the database by either using a List you have created or by uploading XLS or XLSX file. Both options will be detailed below. To begin click on the “Add Accessions or Upload Accession Info” link.
This will open a dialog allowing you to select either “Using Lists” or “Uploading a File”.
3.3.1 Add Accessions Using A List
First we will show how to add accessions “Using Lists”.
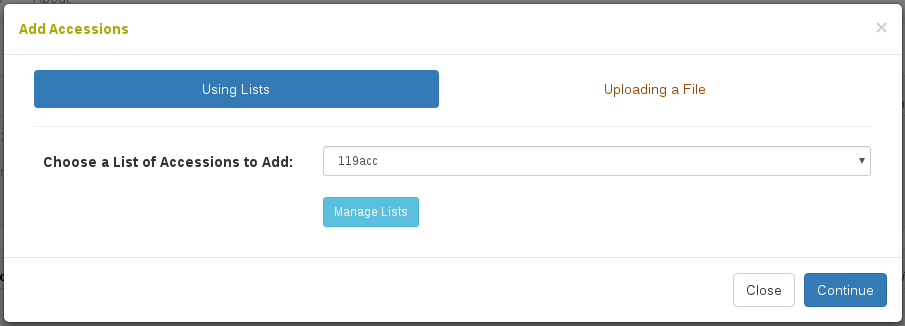
Here you select an accession list which you have previously made. If you need to create or edit your list you can do so now by clicking “Manage Lists”. Once you have selected your list you can click “Continue”.
The first dialog which can appear will show the accessions which already exist in the database.
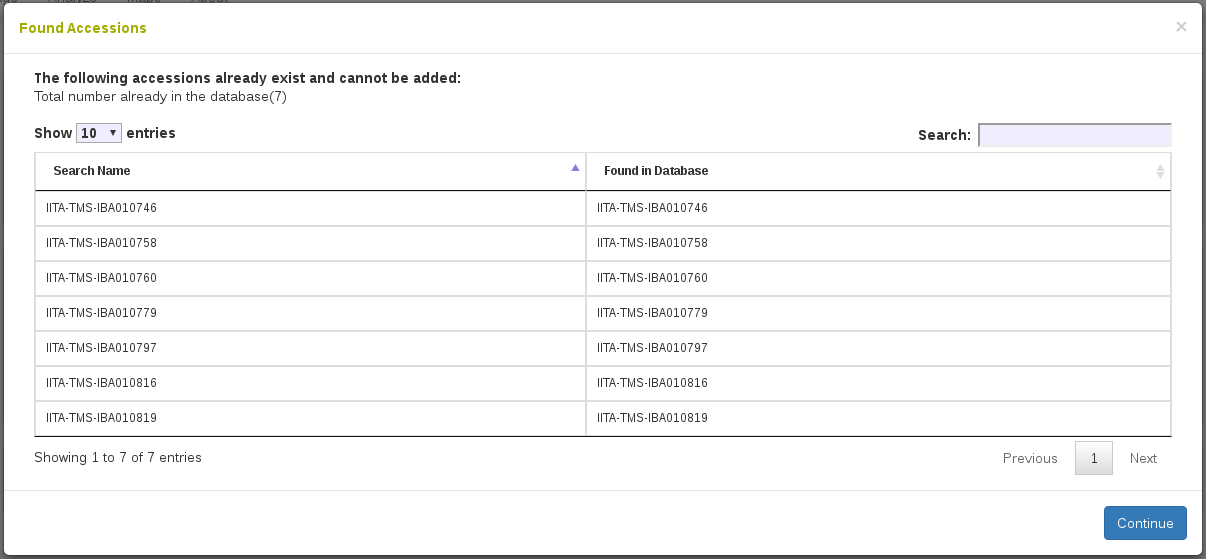
Click “Continue”. The next dialog which can appear will show accessions which have very similar matches to the accession names you are adding. In the example below, there are two accession names that are very similar to accession names already in the database. ‘TME0419’ is very similar to ‘TME419’, and actually is probably a mistake that should not be added to the database.
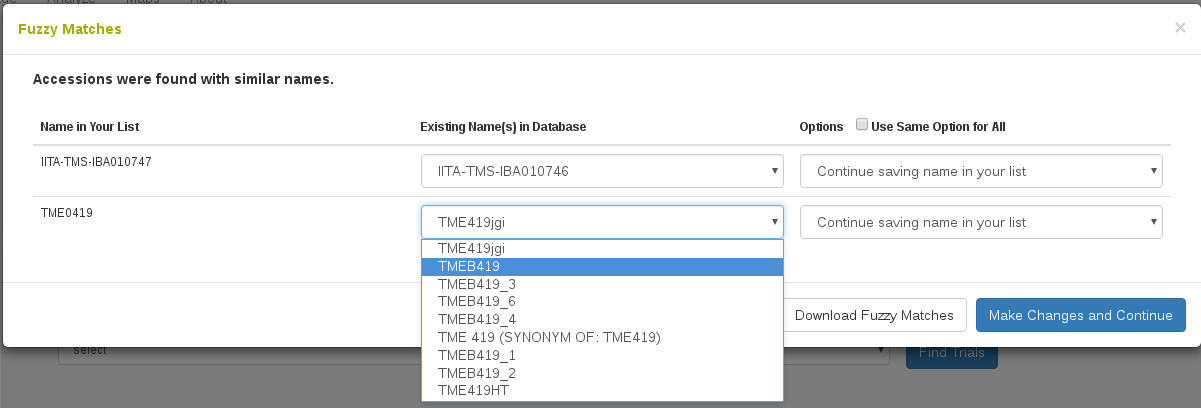
To avoid situations in adding a mistaken duplicate accession, the database gives you options for moving forward with these very similar looking accession names. You can either “continue saving the name in your list”, “replace name in your list with selected existing name”, “remove name in your list and ignore”, or “add name in your list as a synonym to selected existing name”.

Clicking “Download Fuzzy Matches” will return a tabular result of the “fuzzy” accession name results shown. Click “Make changes and continue” to move on.
The final dialog shows the accessions that will be added. Here you need to assign the species of these accessions. You can optionally group the accessions into a population and/or add an organization for the accessions.
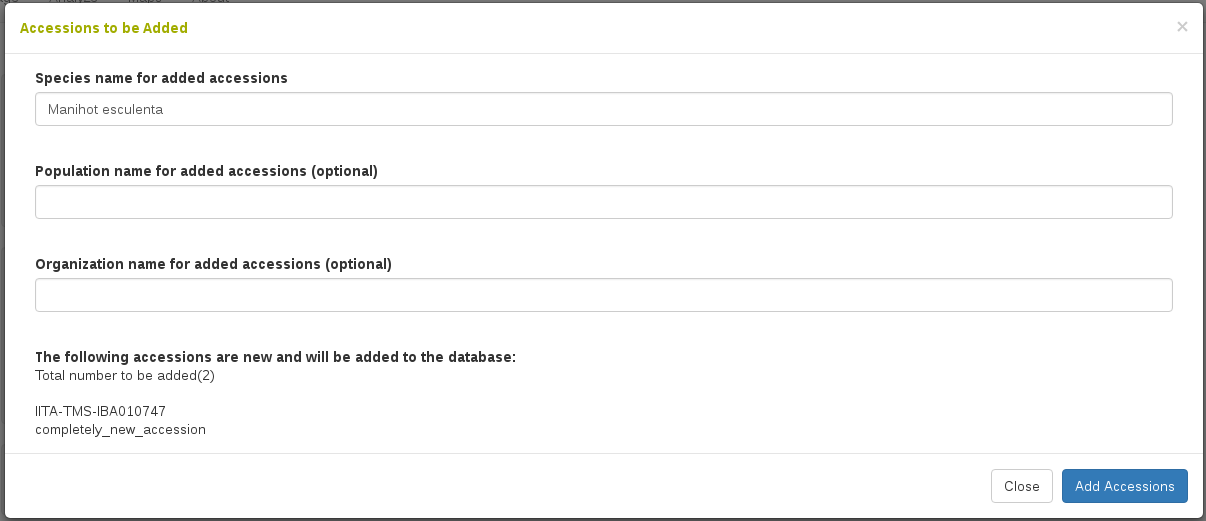
Once you click “Add Accessions”, the new accessions will be created in the database and you will see the following confirmation dialog, which includes links to the newly created accessions.

3.3.2 Uploading Accessions and Accession’s Info From A File
The process to upload accessions is very similar to using a list, but enables you to add a variety of properties, such as synonyms, to the accessions in bulk.
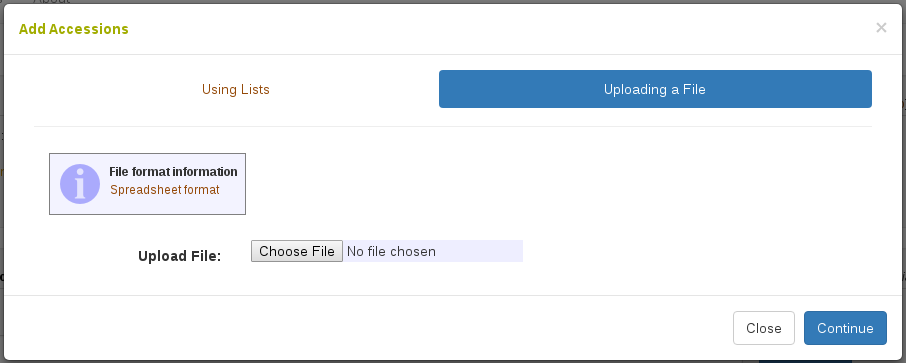
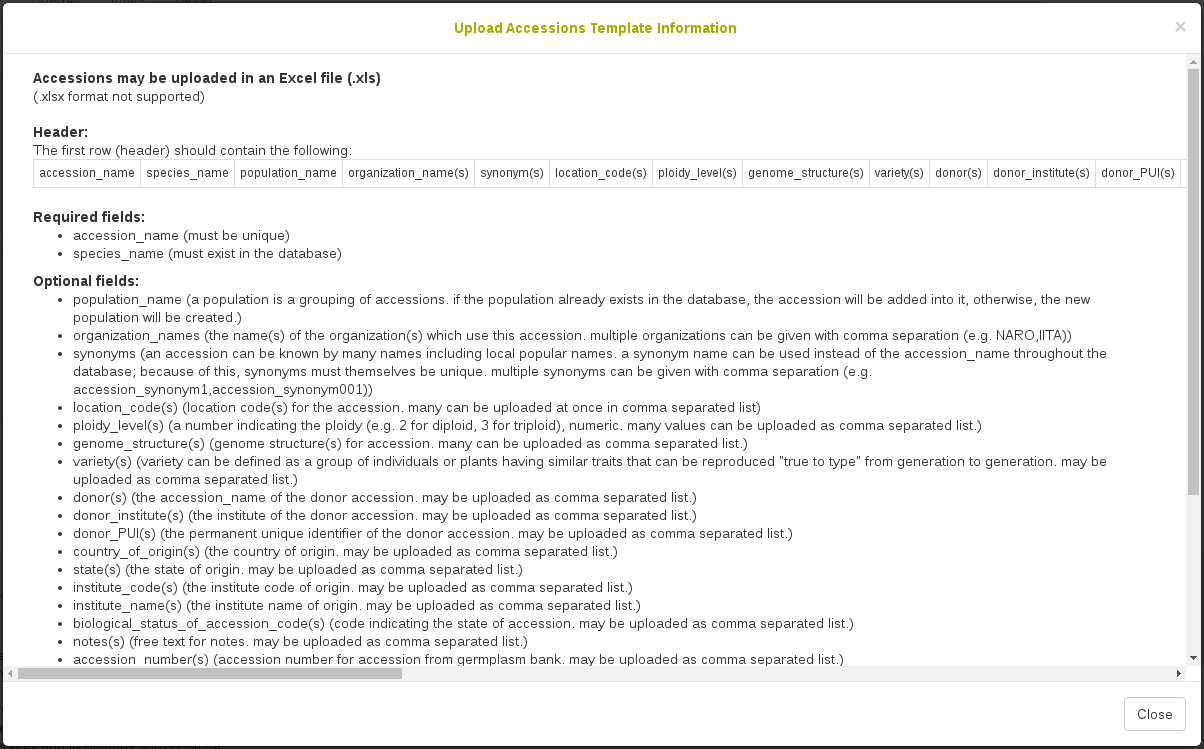
Clicking on “Spreadsheet format” will show the following dialog. Here it shows that the file must be XLS or XLSX format and can contain a number of header columns as attributes. It is important that you use exactly the same header column names as listed here. In columns that indicate that many attribute values can be passed at once using (s), such as synonym(s), you can pass a comma separated list of values, such as ‘synonym1,synonym2’.
Once you have selected your XLS or XLSX file for upload, click “Continue”.
The following process is the same way as with lists:
The first dialog which can appear will show accession names which are already in the database.
Click “Continue” and the next dialog that can appear will show “fuzzy” matches for the accession names you are trying to upload. Here you can choose to prevent adding accession names which look very similar to each other as wrongly duplicated accessions.
Click “Continue” and the final dialog that will appear will show the information to be added into the database. Here it is divided into accession names that are new and accession names that already exist in the database; however, for the accession names that already exist it will show additional attributes that originated from your file that will be added to these accessions.
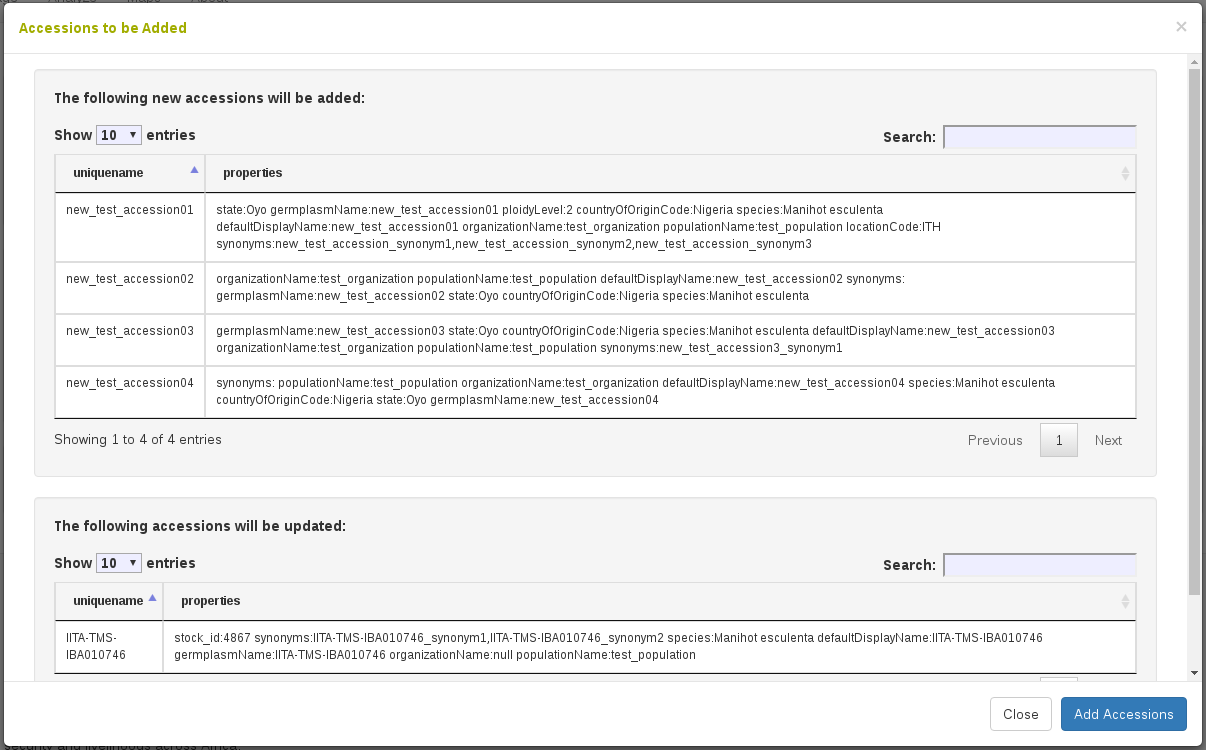
Once you click “Add Accessions”, the new accessions and information will be created in the database and you will see the following confirmation dialog, which includes links to the created and updated accessions.

3.3.3 Add Parentage (Pedigree) Information to Accessions
You can upload pedigree file from your computer to the database by clicking on “Upload Pedigree File”

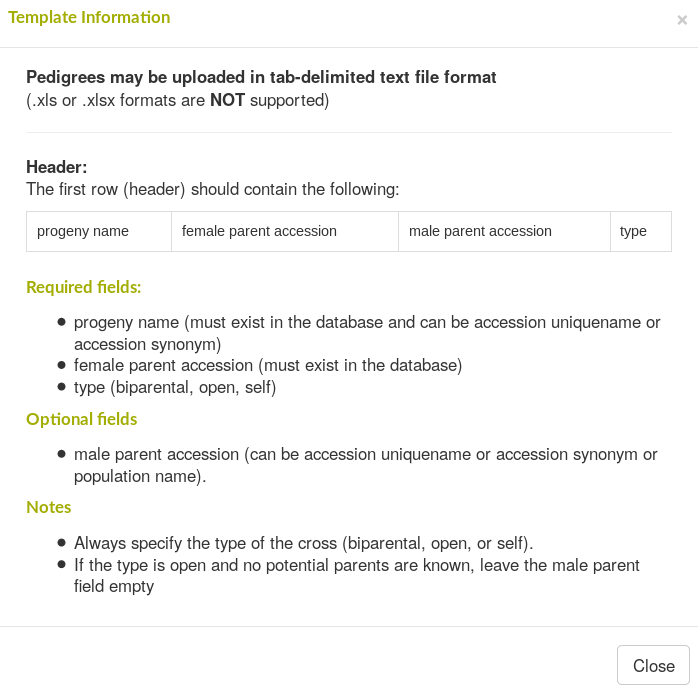
IMPORTANT! Please use only tab-delimited text file format (.xls or .xlsx formats are NOT supported).
You can find detailed information on how to prepare pedigree file by clicking on “File format information”

